Get ready to spin a web of deliciousness with the most frighteningly fun Halloween treat that will make both kids and adults squeal with delight! These Peanut Butter Spider Cookies are not just a dessert - they're an edible work of art that combines the irresistible comfort of classic peanut butter cookies with a spooky twist that's guaranteed to be the star of any Halloween party or fall gathering. Whether you're looking to impress at a baking contest or simply want to create a memorable treat that's equal parts cute and creepy, these spider cookies are about to become your new seasonal obsession!
Prep Time: 15 mins
Cook Time: 10 mins
Total Time: 25 mins
Cuisine: American
Serves: 24 cookies
Ingredients
- 1 cup peanut butter
- 1 cup granulated sugar
- 1 egg
- 1 teaspoon vanilla extract
- 1 cup chocolate chips
- 1 cup pretzel sticks
Instructions
- Preheat the oven to 350°F (175°C) and line two baking sheets with parchment paper to prevent sticking.
- In a large mixing bowl, combine peanut butter, granulated sugar, egg, and vanilla extract. Mix thoroughly until the ingredients are well blended and form a smooth, consistent dough.
- Using clean hands or a cookie scoop, roll the dough into 1-inch round balls. Place the balls about 2 inches apart on the prepared baking sheets.
- Gently press down on each cookie ball with a fork to create a crisscross pattern, which will help the cookies spread evenly during baking.
- Bake the cookies in the preheated oven for 10-12 minutes, or until the edges are lightly golden brown. The centers should look slightly soft but will firm up as they cool.
- Remove the baking sheets from the oven and let the cookies cool on the sheet for 5 minutes before transferring to a wire rack to cool completely.
- While cookies are cooling, melt the chocolate chips using a double boiler or microwave, stirring occasionally to ensure smooth melting.
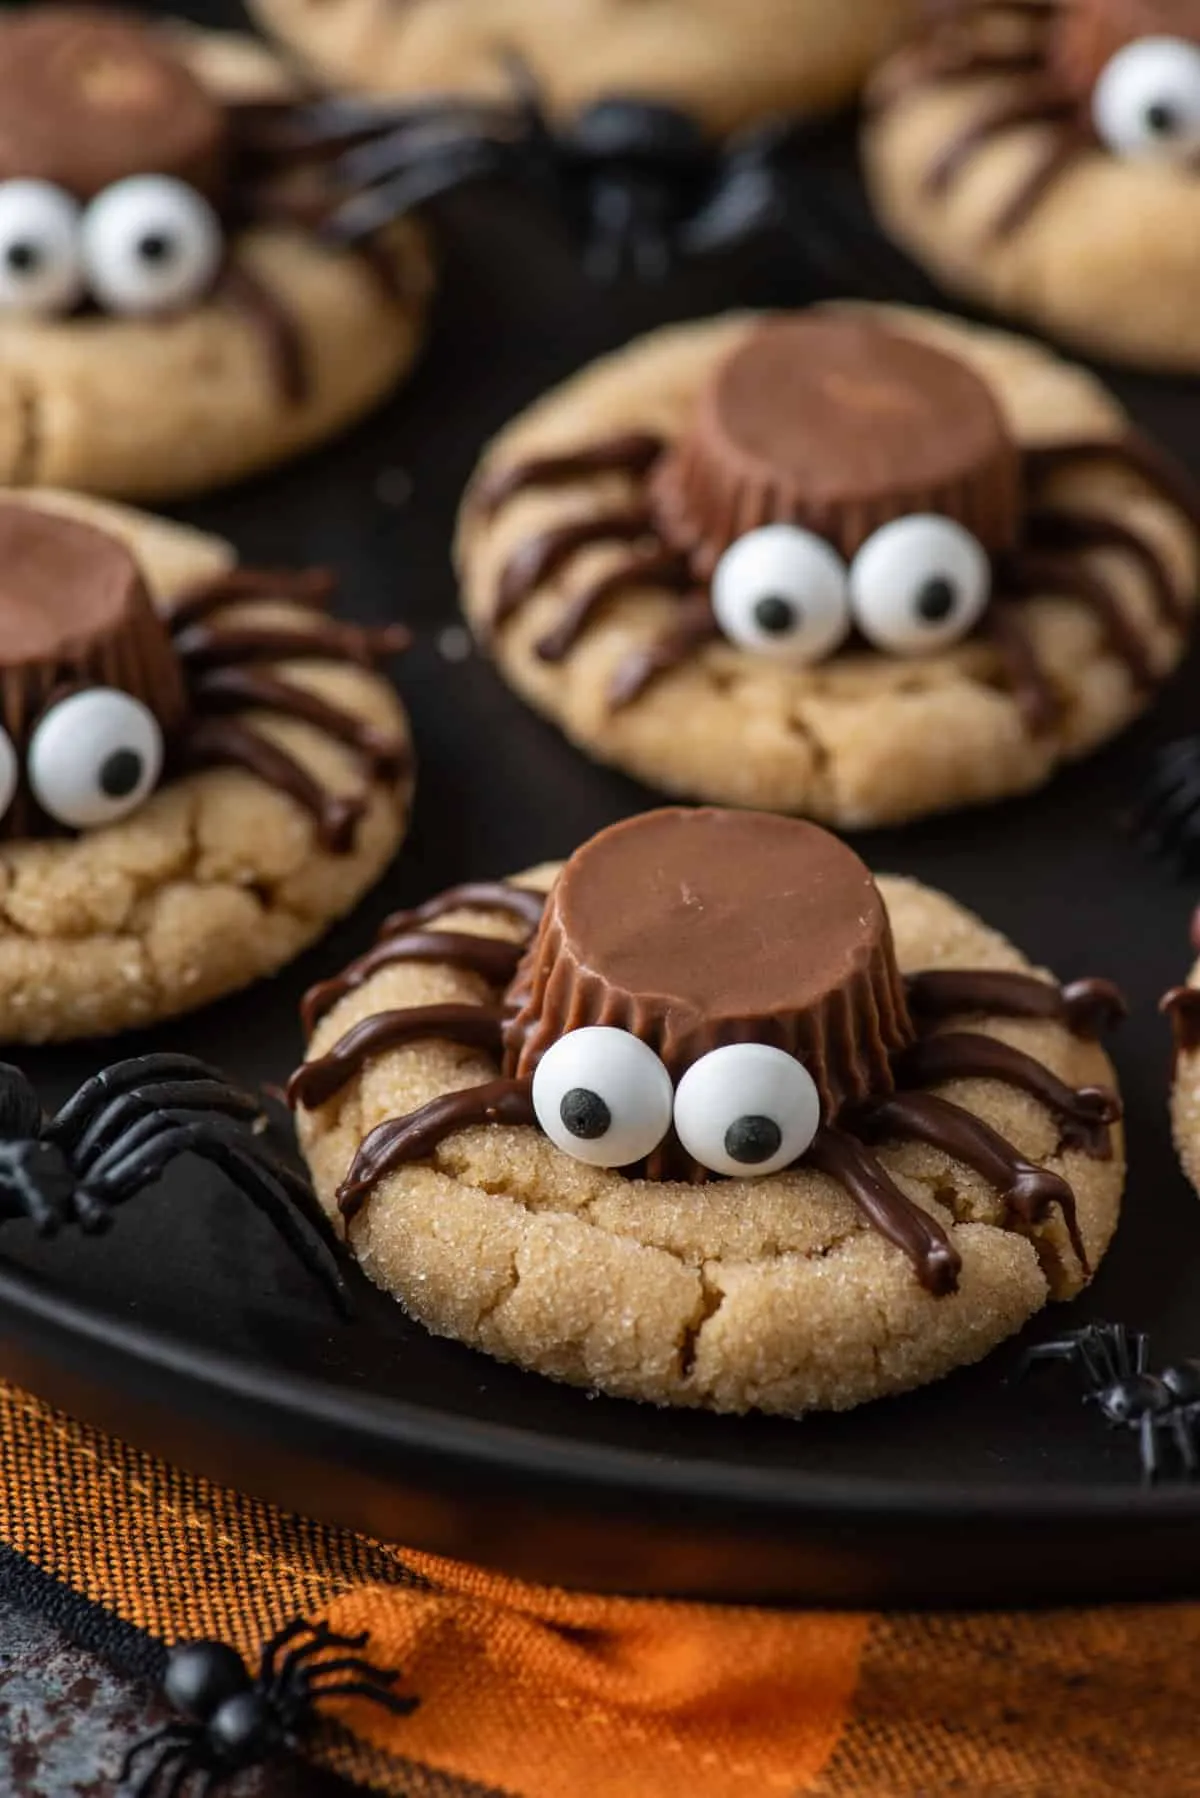
- Once cookies are completely cool, use the melted chocolate to create spider legs by piping thin lines of chocolate extending from the cookie using a piping bag or a small spoon.
- Break pretzel sticks in half and carefully insert them into the sides of each cookie to create spider leg shapes.
- Optional: Use a small dot of melted chocolate to create spider eyes on each cookie for additional decoration.
- Allow the chocolate to set completely at room temperature or place in the refrigerator for faster setting.
- Store the spider cookies in an airtight container at room temperature for up to 5 days, separating layers with parchment paper to prevent sticking.
Tips
- Room Temperature Matters: Ensure your egg and peanut butter are at room temperature for smoother mixing and better cookie texture.
- Chocolate Melting Hack: When melting chocolate, use low heat and stir frequently to prevent burning. A double boiler works best for smooth, even melting.
- Precision in Piping: For clean, thin spider legs, use a piping bag or a small squeeze bottle with melted chocolate for more control.
- Pretzel Leg Pro Tip: Break pretzel sticks carefully to avoid crumbling. A gentle, steady snap works best for creating realistic spider legs.
- Cooling is Crucial: Allow cookies to cool completely before adding chocolate decorations to prevent melting and ensure clean design.
- Storage Secret: Use parchment paper between cookie layers to prevent sticking and maintain the intricate spider leg design.
- Make Ahead Friendly: These cookies can be prepared a day in advance, making them perfect for party planning or busy holiday schedules.
Nutrition Facts
Calories: 180kcal
Carbohydrates: 15g
Protein: 5g
Fat: 12g
Saturated Fat: 4g
Cholesterol: 15mg