Get ready to transform your dinner routine with these mouthwatering Beef Enchiladas that are not just a meal, but a culinary adventure! Imagine coming home after a long day and pulling out a delicious, home-cooked Mexican dish that's been waiting in your freezer – no complicated prep required. These enchiladas are the perfect solution for busy families, meal preppers, and anyone who craves restaurant-quality Mexican food without the hassle. With a perfect balance of savory beef, melted cheese, and zesty enchilada sauce, this recipe will become your new go-to comfort food that's both convenient and incredibly delicious!
Prep Time: 20 mins
Cook Time: 30 mins
Total Time: 50 mins
Cuisine: Mexican
Serves: 8 servings
Ingredients
- 1 pound ground beef
- 1 can enchilada sauce
- 8 tortillas
- 2 cups shredded cheese
- 1/2 cup onion, chopped
- 1 teaspoon cumin
- Salt and pepper to taste
Instructions
- Preheat your oven to 350°F (175°C). This will ensure that your enchiladas cook evenly and thoroughly.
- In a large skillet over medium heat, add the ground beef. Cook the beef, breaking it apart with a spatula, until it is browned and no longer pink, about 5-7 minutes.
- Once the beef is cooked, drain any excess fat from the skillet. Add the chopped onion to the skillet and sauté for about 3-4 minutes until the onion is soft and translucent.
- Stir in the cumin, salt, and pepper, mixing well to combine all the flavors. Allow the mixture to cook for an additional 1-2 minutes.
- Remove the skillet from the heat and add half of the enchilada sauce to the beef mixture. Stir until well combined.
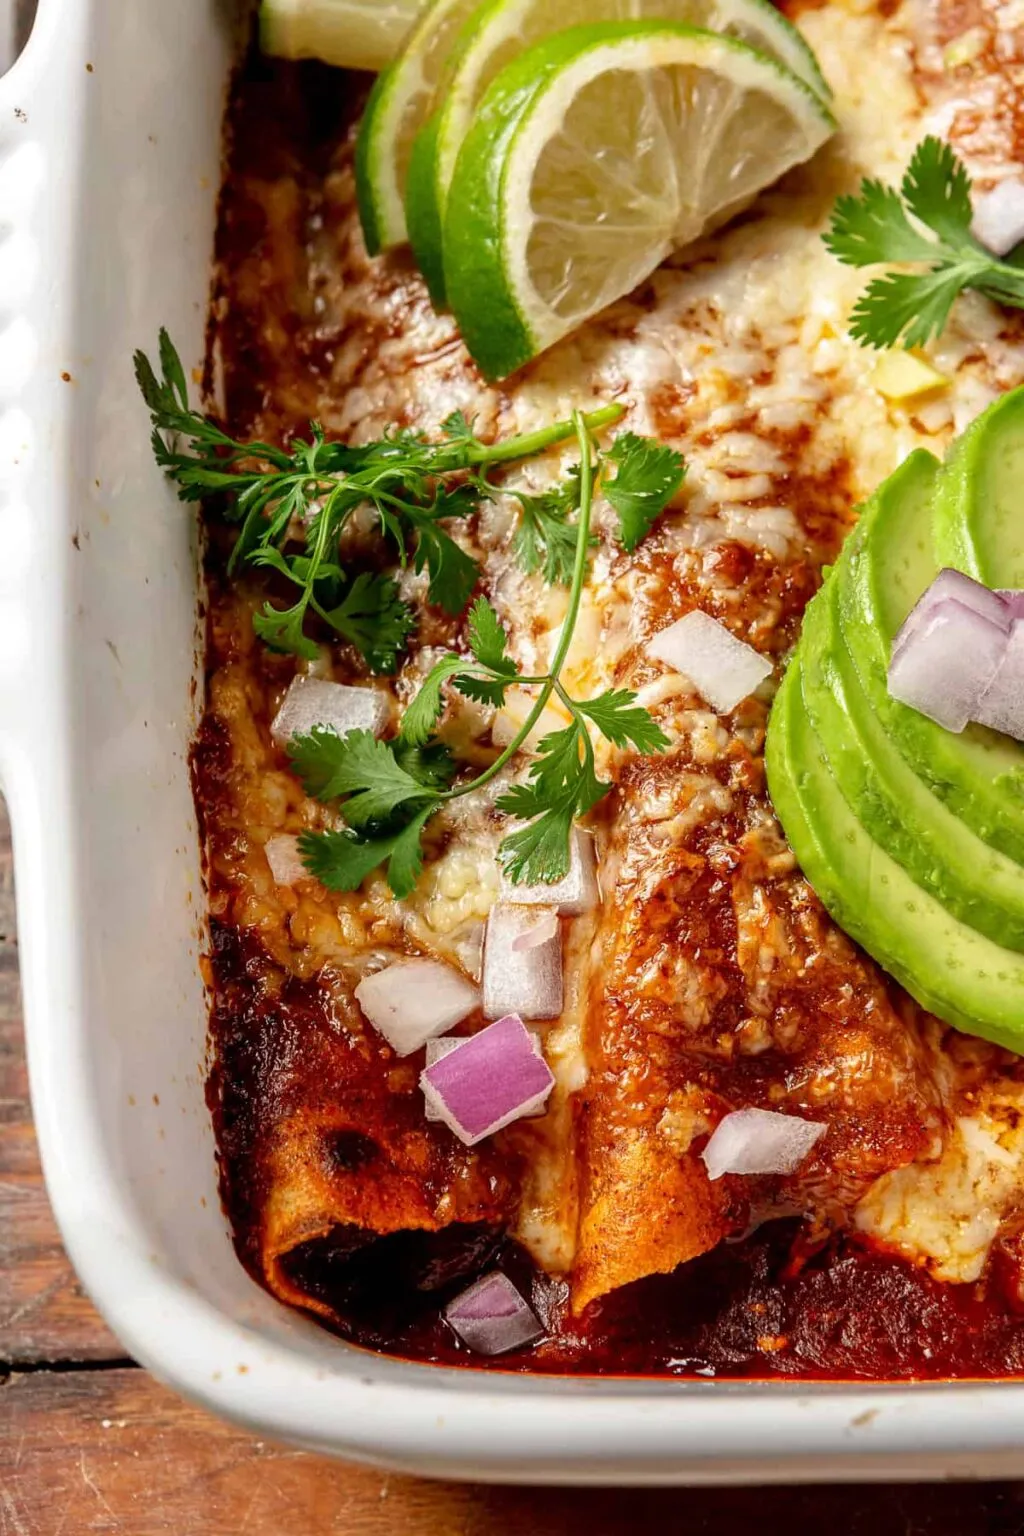
- To assemble the enchiladas, take a tortilla and spoon about 1/4 cup of the beef mixture onto the center. Sprinkle a small amount of shredded cheese on top of the beef mixture.
- Roll the tortilla tightly around the filling and place it seam-side down in a greased 9x13 inch baking dish. Repeat this process with the remaining tortillas and filling.
- Once all the enchiladas are in the baking dish, pour the remaining enchilada sauce evenly over the top. Make sure to cover all the tortillas to keep them moist while baking.
- Sprinkle the remaining shredded cheese over the top of the enchiladas, ensuring an even layer for a cheesy finish.
- Cover the baking dish with aluminum foil and bake in the preheated oven for 20 minutes. This will help steam the enchiladas and keep them tender.
- After 20 minutes, remove the foil and bake for an additional 10 minutes, or until the cheese is melted and bubbly.
- Once cooked, remove the enchiladas from the oven and let them sit for about 5 minutes before serving. This will help them set and make them easier to serve.
- To freeze, allow the enchiladas to cool completely. Then, cover the dish tightly with plastic wrap or aluminum foil and place it in the freezer. They can be stored for up to 3 months.
- To reheat frozen enchiladas, remove from the freezer and let them thaw in the refrigerator overnight. Preheat the oven to 350°F (175°C) and bake covered for about 25-30 minutes or until heated through.
Tips
- Choose the right tortillas: Use fresh, soft flour tortillas that are easy to roll and won't crack.
- Drain beef thoroughly: Remove excess fat to prevent soggy enchiladas and ensure a perfect texture.
- Customize your spice level: Adjust cumin and add chili powder for extra kick if you like spicier food.
- Cheese matters: Use a blend of cheeses like cheddar and Monterey Jack for more complex flavor.
- Freezing hack: Place parchment paper between enchiladas when freezing to prevent them from sticking together.
- Reheating tip: Always cover with foil when reheating to keep moisture and prevent drying out.
- Make-ahead magic: You can prepare the filling a day in advance to save time on cooking day.
Nutrition Facts
Calories: 380kcal
Carbohydrates: 25g
Protein: 22g
Fat: 22g
Saturated Fat: 10g
Cholesterol: 70mg