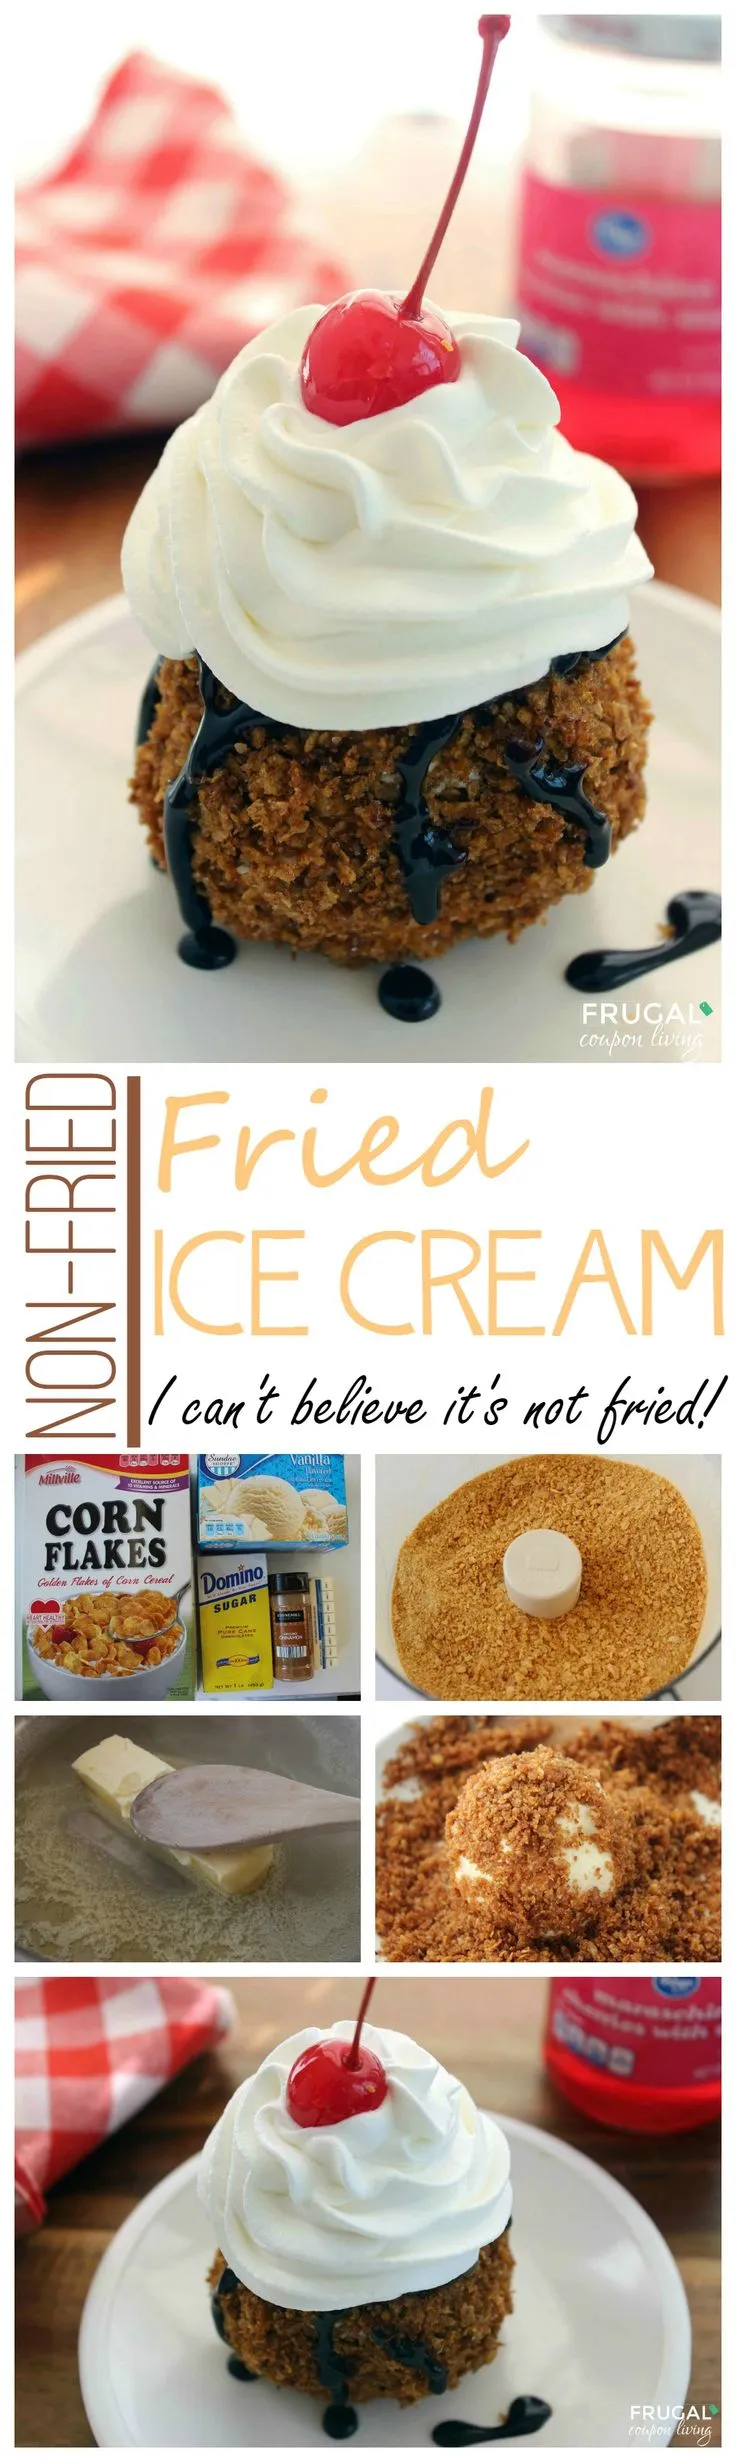
Get ready to experience a dessert that's about to blow your mind! Imagine the crispy, crunchy exterior of fried ice cream without the deep-frying mess - sounds impossible, right? Our Non Fried Fried Ice Cream is a game-changing Mexican-inspired treat that delivers all the excitement of a classic dessert with zero oil and maximum flavor. In just 20 minutes, you'll create a show-stopping dessert that looks like it came from a gourmet restaurant but can be easily made right in your own kitchen!
Prep Time: 20 mins
Cook Time: -
Total Time: 20 mins
Cuisine: Mexican
Serves: 4 servings
Ingredients
- 4 cups vanilla ice cream
- 1 cup cornflakes, crushed
- 1/2 cup shredded coconut
- 1/4 cup sugar
- 1 tsp cinnamon
- Chocolate syrup for drizzling
Instructions
- Begin by preparing your workspace and gathering all the ingredients needed for the Non Fried Fried Ice Cream. Ensure that your vanilla ice cream is slightly softened for easier handling.
- In a medium-sized mixing bowl, combine the crushed cornflakes, shredded coconut, sugar, and cinnamon. Mix these dry ingredients thoroughly until they are well combined, creating a sweet and crunchy coating for the ice cream.
- Using a scoop or a large spoon, portion out 4 generous scoops of vanilla ice cream and place them on a parchment-lined baking sheet. Each scoop should be about 1 cup in size.
- Once you have scooped out the ice cream, use your hands (dipped in a little water to prevent sticking) to shape each scoop into a ball. This will help the coating adhere better.
- Next, take each ice cream ball and roll it in the cornflake mixture, ensuring that it is evenly coated all around. Press gently to help the coating stick to the ice cream.
- After coating all the ice cream balls, place the baking sheet in the freezer for at least 15 minutes. This will help the ice cream firm up and maintain its shape.
- Once the ice cream balls have been chilled, remove them from the freezer. They are now ready to serve.
- To serve, place each coated ice cream ball in a dessert bowl or on a plate. Drizzle with chocolate syrup for added sweetness and presentation.
- Enjoy your Non Fried Fried Ice Cream immediately while it's cold and refreshing!
Tips
- • Make sure your ice cream is slightly softened but not melting when you start shaping the balls • Use cold, slightly damp hands when forming ice cream balls to prevent sticking • Work quickly when coating the ice cream to prevent melting • For extra crunch, you can toast the coconut and cornflakes lightly before mixing • If you want to prepare ahead, you can keep the coated ice cream balls in the freezer for up to 2 hours before serving • For a fun variation, try using different ice cream flavors like chocolate or caramel • Serve immediately after drizzling chocolate syrup to maintain the perfect texture and temperature
Nutrition Facts
Calories: 320kcal
Carbohydrates: 45g
Protein: 5g
Fat: 15g
Saturated Fat: 10g
Cholesterol: 50mg