Prepare to be transported to a world of decadent, melt-in-your-mouth deliciousness with these stunning Red Velvet Shortbread Cookies! Imagine a cookie that combines the rich, velvety texture of classic shortbread with the show-stopping color of red velvet – it's like a dessert that walked straight out of a gourmet bakery and into your kitchen. Whether you're looking to impress guests, treat yourself to a luxurious sweet moment, or simply elevate your baking game, these cookies are about to become your new obsession!
Prep Time: 10 mins
Cook Time: 15 mins
Total Time: 25 mins
Cuisine: American
Serves: 24 cookies
Ingredients
- 1 cup unsalted butter, softened
- 1/2 cup powdered sugar
- 1 1/2 cups all-purpose flour
- 1/4 cup cocoa powder
- 1 tablespoon red food coloring
- 1 teaspoon vanilla extract
Instructions
- Ensure all ingredients are at room temperature, especially the butter, which should be soft but not melted.
- In a large mixing bowl, cream the softened unsalted butter and powdered sugar together until light and fluffy, using an electric mixer. Mix for approximately 3-4 minutes until the mixture is smooth and well combined.
- Add vanilla extract and red food coloring to the butter mixture. Mix thoroughly until the color is evenly distributed and vibrant red.
- In a separate bowl, sift together the all-purpose flour and cocoa powder to remove any lumps and ensure even mixing.
- Gradually add the dry ingredients to the butter mixture, mixing on low speed until just combined. Be careful not to overmix, which can make the cookies tough.
- Once the dough comes together, form it into a log shape approximately 2 inches in diameter. Wrap the dough log in plastic wrap and refrigerate for 30 minutes to firm up.
- Preheat the oven to 350°F (175°C) and line two baking sheets with parchment paper.
- Remove the dough from the refrigerator and slice into 1/4-inch thick rounds using a sharp knife.
- Place the cookie rounds on the prepared baking sheets, spacing them about 1 inch apart.
- Bake in the preheated oven for 12-15 minutes, or until the edges are lightly set and just beginning to turn golden.
- Remove from the oven and let the cookies cool on the baking sheet for 5 minutes, then transfer to a wire rack to cool completely.
- Once cooled, the cookies can be stored in an airtight container at room temperature for up to 5 days.
Tips
- Temperature Matters: Ensure your butter is truly at room temperature – soft enough to cream easily, but not melted. This is crucial for achieving the perfect cookie texture.
- Don't Overmix: When combining dry and wet ingredients, mix just until the dough comes together. Overmixing can lead to tough, dense cookies.
- Chill for Success: The 30-minute refrigeration is non-negotiable! This helps the cookies maintain their shape and develop a rich, buttery flavor.
- Uniform Slicing: Use a sharp knife and try to keep your cookie slices consistent (about 1/4-inch thick) to ensure even baking.
- Watch the Edges: The cookies are done when the edges are just set and lightly golden. They'll continue to firm up as they cool.
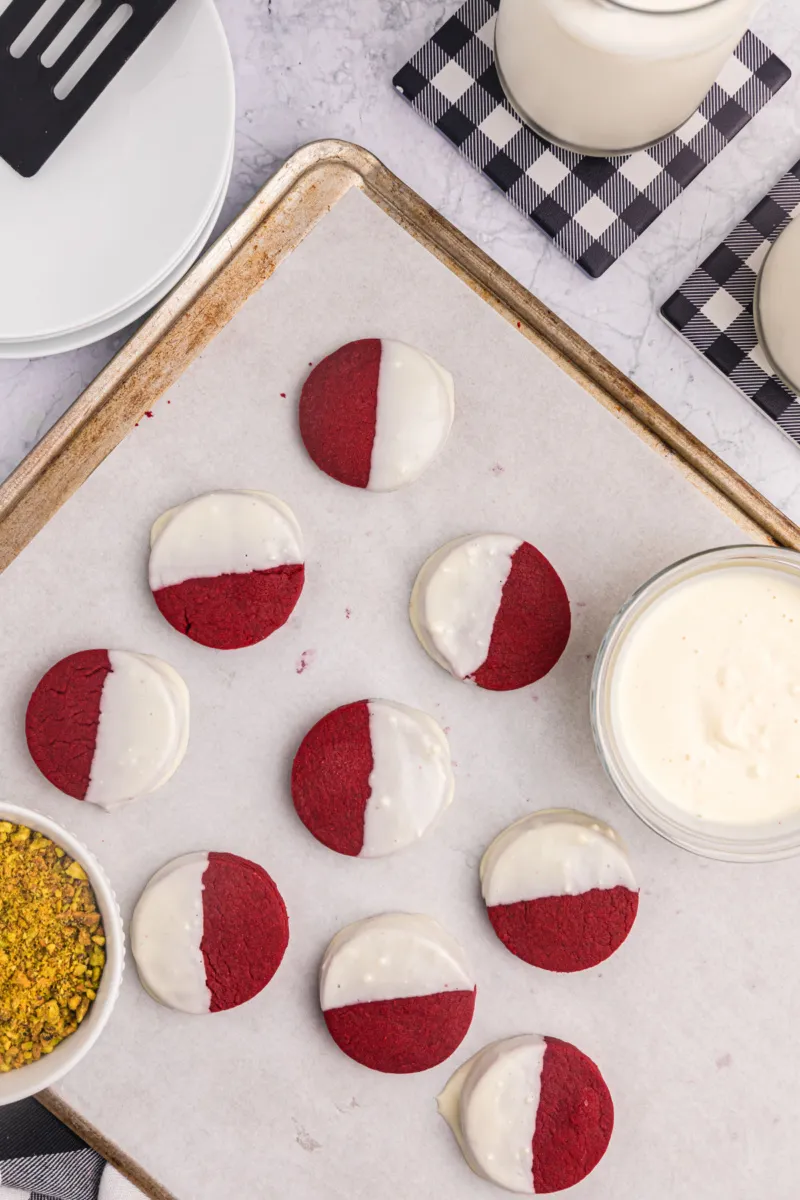
- Storage Tip: Store in an airtight container to keep them fresh for up to 5 days – if they last that long!Pro Bonus: For an extra touch of elegance, consider dusting these cookies with a light sprinkle of powdered sugar or drizzling with white chocolate for a stunning presentation.
Nutrition Facts
Calories: 110kcal
Carbohydrates: g
Protein: 1g
Fat: g
Saturated Fat: g
Cholesterol: 17mg